I accidentally deleted photos from my SD card after moving files from my camera, and now important family pictures are missing. I stopped using the card right away because I do not want to overwrite anything. I need simple step-by-step help to recover the pictures safely and want to know the best SD card photo recovery method.
If you deleted photos from an SD card, the first move is simple. Stop using the card.
I mean right away. Don’t shoot more photos. Don’t record video. Don’t leave it in the camera and keep poking around. I’ve seen people lose recoverable files because they kept using the card for ten more minutes like nothing happened.
What trips people up is the word deleted. On most SD cards, deleted does not mean the photo data vanished on the spot. Usually the file entries get removed first, while the image data sits there until new data lands on top of it. If nothing has overwritten those blocks yet, you still have a shot.
One thing I would not do early on is run repair tools. If Windows pops up with a repair or format prompt, leave it alone for now. Same idea with CHKDSK. Those tools write changes to the file system, and I’ve seen that make recovery worse, not better.
For recovery software, I’d go with Disk Drill. I’ve tested a pile of these tools over time, and for SD cards this one tends to hold up well. It’s easy enough if you don’t do recovery often, but it still has deeper scanning when the card is in rough shape.
Where it helped me more than some cheap tools was with cards that were not simply ‘oops I deleted a folder.’ It also deals with formatted cards, damaged partitions, RAW file systems, and those weird cases where the card looks empty but the used space is still there.
Here’s the short version of the process:
- Put the SD card into your computer with a card reader.
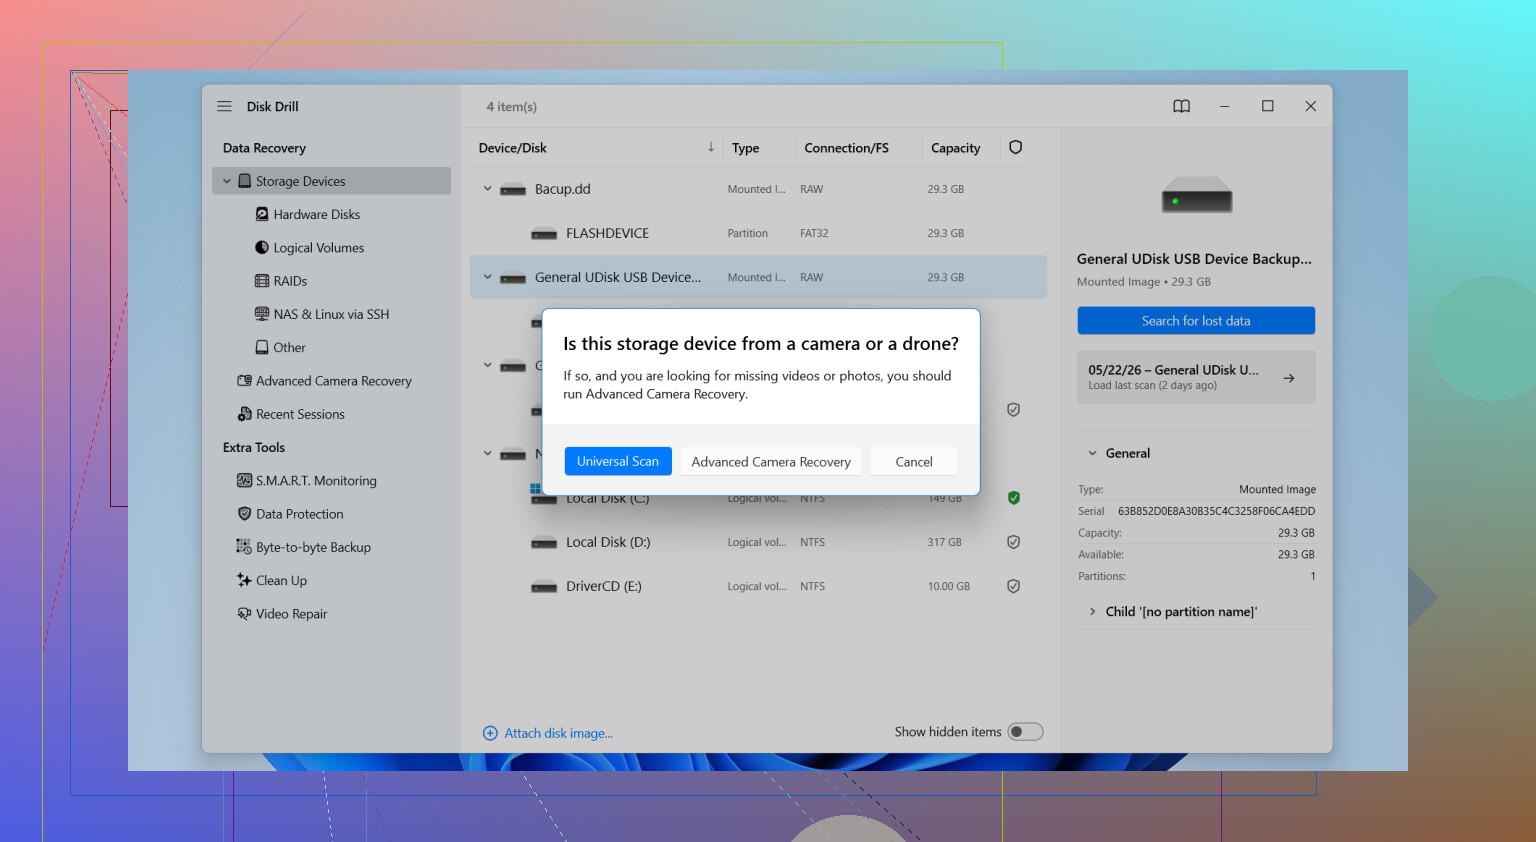
- Open Disk Drill and find the card in the device list.
- Start a scan.
- Let the scan finish all stages.
- Check the Pictures area or filter by file type.
- Preview what looks intact.
- Recover the files to a different drive, not back onto the same SD card.
That last part matters more than people think. Don’t restore onto the original card. You’d be writing over the same place you’re trying to rescue data from. Bad idea.
If your card came from a camera, format support matters. A lot. I’ve run into cards full of RAW photos and big video clips, and some lower-end tools were fine with JPGs but fell apart on anything else. Disk Drill supports formats like JPG, PNG, CR2, CR3, NEF, ARW, RAF, DNG, and a long list beyond those. If you shoot with a DSLR or mirrorless body, that makes a difference.
The preview feature is useful too. I like being able to check whether a file opens before I recover a few hundred gigs of junk. Saves time. Saves frustration.
If the SD card is flaky, disconnects mid-scan, or looks corrupted, I’d be more careful. In those cases, making a byte-to-byte backup image first is safer. You work from the copy instead of hammering the original card over and over. I learned this one the hard way on an old SanDisk card years ago. The second scan was worse than the first. Should’ve imaged it first.
Before you go too far with recovery software, check the boring places too. People skip these and then kick themselves later.
- Google Photos or iCloud sync
- Old backups on an external drive
- The camera’s internal storage, if it has any
- Copies already imported onto your computer
- Time Machine or Windows File History
If none of those pans out, and the card has physical issues, pro recovery is the next step. That gets expensive fast. For most people, software is the first thing worth trying unless the SD card is damaged in a physical way or the computer won’t read it at all.
1 Like
You did the most important thing already. You stopped using the SD card. That keeps your chances up.
I agree with @mikeappsreviewer on skipping repair prompts. I’d add one more thing. Don’t browse the card a lot either. Some cameras and phones write thumbnails or index files, and people miss that.
My step order would be this.
- Use a good card reader, not the camera USB cable. Direct readers fail less often.
- If the card acts weird, slow reads, disconnects, errors, make an image of it first.
- Scan the image or the card with Disk Drill.
- Sort results by file type and date, not only by folder names. Deleted folder structure is often gone.
- Preview a few photos from different dates. If previews fail, try a deeper scan.
- Recover to your computer or an external drive. Never back to the SD card.
Small disagreement with the usual advice. I would check the camera too before spending time scanning. Some cameras keep copies in internal memory, and some imports leave files on the PC in temp or import folders. Search your computer for JPG, CR2, NEF, ARW, DNG, and sort by date. It sounds dumb, but I’ve seen people ‘recover’ files they already had.
If the card shows 0 bytes, asks to format, or keeps dropping offline, stop messing with it. Repeated scans can make a bad card worse. At that point, imaging first matters a lot.
Disk Drill is a solid pick for SD card photo recovery because it handles common camera formats well and its preview saves time. For family photos, I’d start there.
Also, if you want a quick visual walkthrough, this helps: watch this SD card photo recovery short
If the card has physical damage, cracked shell, bent pins, water exposure, software won’t do much. Lab recovery is the next step, and yeah, it gets expnsive fast.

One thing I’d do a little differently from @mikeappsreviewer and @hoshikuzu is check whether the files were actually moved or just hidden in some dumb import folder first. Windows Photos, camera vendor apps, and even Finder imports can leave copies in weird places. Search your computer by file extension and date before you spend an hour scanning. Try JPG, JPEG, PNG, CR2, CR3, NEF, ARW, DNG.
If they’re truly gone, the safest route is:
- Lock the SD card if it has a write-protect switch.
- Use a card reader, not the camera connection.
- If the card is stable, scan it with Disk Drill.
- If the card is unstable, make an image first, then scan the image.
- Recover to your computer or another drive only.
Small disagreement with the “deep scan everything immediately” mindset: if the card is healthy and the deletion was recent, start with the faster scan modes first so you can find intact filenames/folders before going full caveman. Deeper scans are great, but they can dump thousands of generically named files on you. Kinda messy, tbh.
Also, if Windows says “fix” or “format,” click absolutely none of that.
For extra reading, this thread is pretty on-point: how to recover deleted photos and camera RAW files from an SD card
If the card disconnects, gets super hot, or reads 0 bytes, stop. That’s where DIY turns into “oops I made it worse.”
One extra angle nobody’s stressed enough: check whether the card is actually full-size SD or microSD in an adapter. Bad adapters cause fake corruption all the time. I’d swap the reader and adapter before assuming the photos are gone.
I slightly disagree with the “just scan first” approach from @hoshikuzu, @suenodelbosque, and @mikeappsreviewer if the card starts acting flaky. My order would be:
- Test in a different reader
- If readable, copy the entire card contents normally first
- If not, then image it
- Only then run recovery
Why? Sometimes “deleted” photos are still in a hidden DCIM subfolder or a broken import created duplicates elsewhere.
For software, Disk Drill is a reasonable pick.
Pros
- Good preview support for photo formats
- Easy to sort by type/date
- Can scan damaged or formatted cards
- Simple enough for non-tech users
Cons
- Deep scans can return lots of junk with generic names
- Full recovery usually means paying
- On unstable cards, repeated rescans are still risky
One more thing: if the missing pictures are from a phone’s SD card, check whether they were encrypted by that phone. If yes, recovery on a PC may find files that won’t open properly until handled on the original device. That catches people out a lot.