My Seagate Backup Plus drive suddenly stopped showing my files, and Windows either doesn’t detect it or asks me to format it. I have important backups and personal data on it, so I’m looking for safe Seagate Backup Plus recovery options before I risk making things worse.
Sorry you’re dealing with that. A Seagate Backup Plus that suddenly looks empty, asks to be formatted, or acts like a brand-new drive is pretty stressful, but don’t start clicking around yet.
The big thing is this: stop using the drive right away. Don’t copy anything to it, don’t run random repair tools, and don’t format it. If files were deleted or the file system flipped to RAW, the data may still be sitting there, but the drive marks that space as reusable. The longer it stays connected and active, the more chances Windows or some background process has to write over the stuff you’re trying to recover.
First, check whether this seems like a hardware problem or a file system problem.
If the drive is clicking, grinding, repeatedly spinning up and down, or making some awful loud whirring sound, that’s a bad sign. Software recovery usually isn’t the answer for physical failure. In that case, check Seagate’s Rescue Data Recovery Services before doing anything else. Some Backup Plus drives include a period of recovery coverage with the warranty, so it’s worth checking the serial number instead of assuming it’ll be expensive.
If it sounds normal, but Windows won’t show it in File Explorer or says you need to format it before use, that’s more likely a logical issue. Annoying, but usually more recoverable. The files may still be there, while the drive’s “index” or file system is what got damaged.
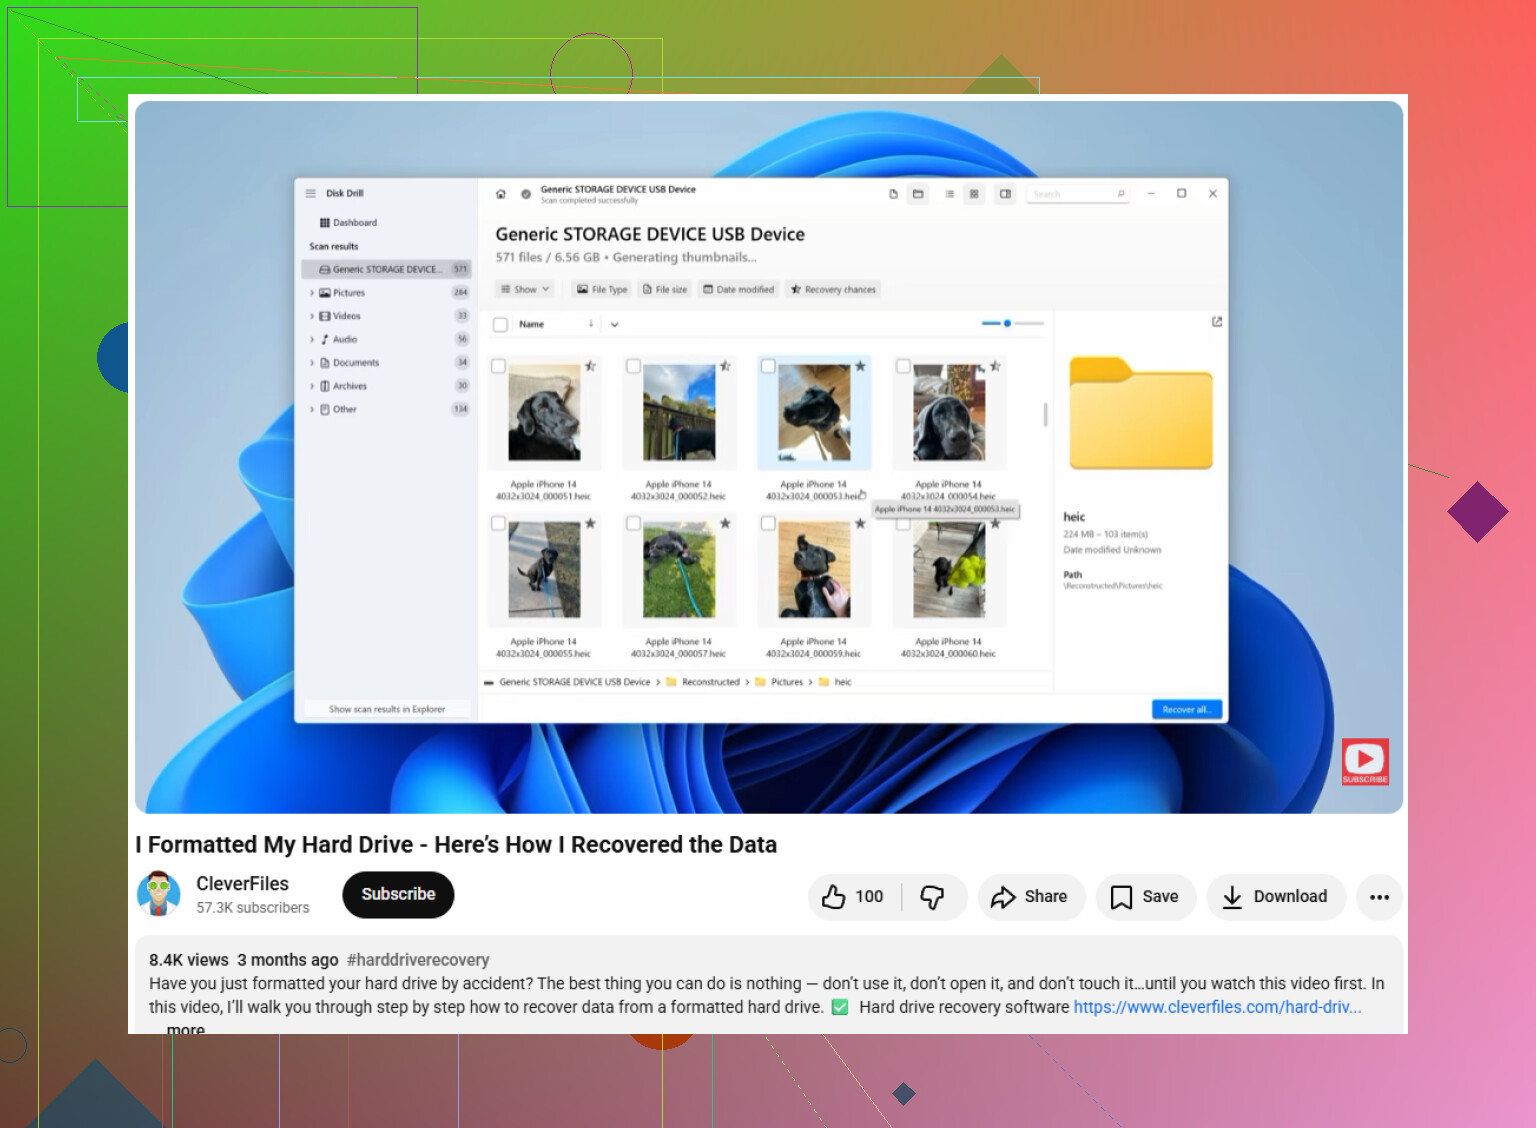
For DIY recovery, I’d usually use something like Disk Drill. It’s a solid option for RAW partitions and external drives that got corrupted after being unplugged badly or failing to eject cleanly.
Here’s the safest way I’d go about it:
-
Don’t install anything on the Seagate drive. Install the recovery software on your internal drive, like C:, or on another external drive.
-
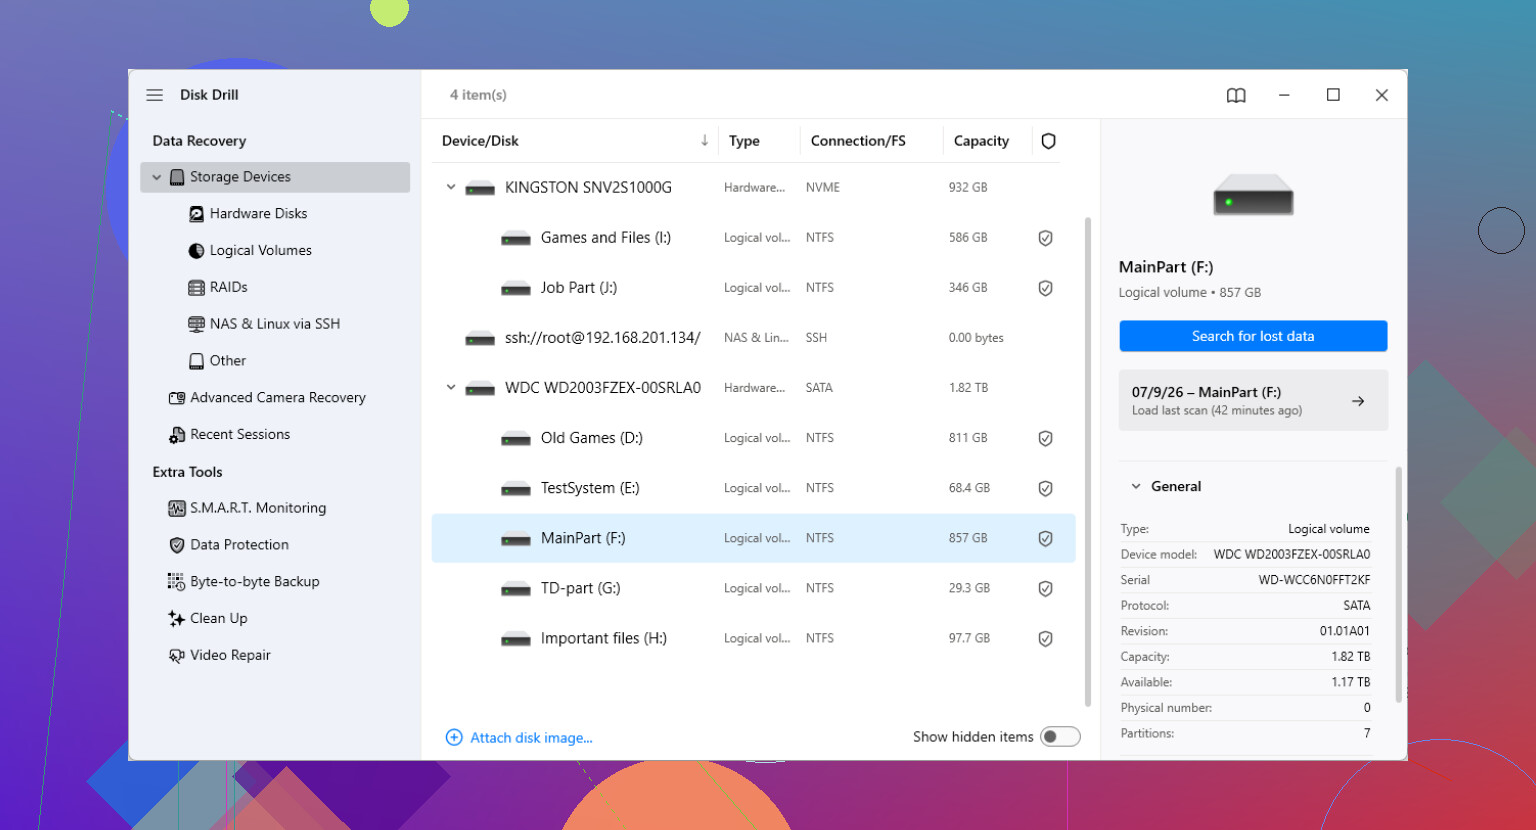
If the drive is unstable, make an image first. Disk Drill has a Byte-to-byte backup option in its extra tools. Use that to create a full disk image of the Seagate. Then disconnect the physical drive and scan the image instead. That puts a lot less stress on the actual hardware.
-
Use a good USB cable. If you scan the drive directly, try another cable first. Bad USB cables can make a drive look dead or corrupted when it isn’t. Pick the Seagate drive in the software and start the lost data scan.
-
Preview before recovering. Don’t just dump everything out blindly. Use preview on photos, documents, or videos when possible. If the file previews correctly, that’s usually a very good sign it can be recovered.
-
Recover to a different drive. This matters. Never save recovered files back onto the same Seagate drive you’re recovering from, because you can overwrite more data.
If the recovery tool doesn’t list the drive, open Disk Management in Windows. If the Seagate shows up there with the correct capacity, like 2TB or 5TB, recovery software still has a decent shot even if File Explorer can’t read it.
After you get the files back, don’t trust the drive immediately. Grab SeaTools from Seagate and run the Long Generic Test. If it fails, retire the drive. If it passes, you can format it and reuse it, but I’d still keep another backup somewhere else.
Large external drives can take a long time to scan, so don’t panic if it’s slow. If the drive is still spinning normally and showing the right size, there’s a decent chance your files are recoverable.
1 Like
A drive that shows the right size in Disk Management is a very different job from a drive that appears as 0 bytes or keeps disconnecting. If it’s the first case, I’d avoid CHKDSK for now, even though Windows may suggest “repairing” it, because that can make a messy file system harder to recover cleanly. Scan it read-only with something like Disk Drill, or better, scan an image of it if you have enough spare space. If it’s the second case, don’t keep retrying scans for hours. That usually turns into “I almost recovered it” territory while the drive gets worse. Check the cable/enclosure if possible, but if the drive can’t stay connected long enough to read steadily, professional recovery is the safer route.
Whether the drive contains normal copied files or Seagate Toolkit backup sets matters here. If it was just drag-and-drop files, most recovery programs will show the original folder tree if the file system is still partly intact. If it was a Toolkit backup, you may recover a pile of backup database folders or versioned chunks first, and it can look “wrong” until you understand how the backup software stored it.
I agree with the warning about not running CHKDSK. That is probably the most common “I was trying to fix it and made it worse” move with external drives. Windows is not trying to recover your photos or documents when it suggests repair. It is trying to make the volume mountable again, and those are different goals.
A detail people skip: check Disk Management, but do not click Initialize, New Simple Volume, Convert, or Format. Just look. The useful info is:
Does it show the correct capacity?
Does it show as RAW?
Does it show unallocated?
Does it appear for a few seconds and vanish?
Does it have a drive letter but File Explorer still complains?
If it shows the correct size and stays connected, I’d treat it as recoverable until proven otherwise. If it appears as 0 bytes, no media, or keeps dropping out, software is mostly a waste of time and may beat up the drive.
For a safer DIY route, I’d borrow or buy another drive that is at least the same size as the Seagate and make a full image first. Not “copy the files,” but image the whole disk. This is annoying because a 5TB drive needs 5TB of space even if you only had 600GB of files on it, but it gives you a fallback. Scan the image, not the original, when possible.
Disk Drill is fine for the more user-friendly route, especially if you want previews and don’t want to mess with Linux tools. The caveat is that the scan result can look impressive and still include damaged files, duplicates, old deleted junk, and files with generic names. Don’t judge it by the number of files found. Judge it by whether your important folders preview correctly and recover to another disk.
If you want a cheaper or more technical check before paying for anything, DMDE can often tell you quickly whether the partition structure is still there. It is not as friendly, and it is easier to click the wrong thing if you are rushing, so I would not recommend it to someone who wants a guided recovery experience. But it can be useful for a quick look at whether the old NTFS/exFAT volume is visible.
Do not recover back to the Seagate. That includes “just one test file.” Recover to your internal drive or a different external drive. Writing anything to the problem disk is how recoverable data turns into overwritten data.
If you already formatted it, that is a different situation from “Windows is asking me to format.” A quick format may still leave a lot of data recoverable, but a full format or continued use after formatting is much worse. In that case, stop immediately and scan the drive as a formatted volume. If you have not formatted it yet, don’t do it just to make Windows happy.
Last thing: if this drive had only one copy of the data, it wasn’t really a backup anymore. After recovery, I’d retire it from important use unless it passes a full Seagate diagnostic and even then I’d keep it as a third copy, not the main backup target. External drives that disappear once tend to earn less trust the second time.